| April 6, 2024 |
A Step-by-Step Guide to Setting Up an NFS File Witness with SIOS LifeKeeper on Linux |
||||||||||||||||||||||||||||
| QUORUM_MODE | |||||
| majority | tcp_remote | storage | none/off | ||
| WITNESS_MODE | remote_verify | Supported3 or more nodes | Supported3 or more nodes | Not supported | Supported3 or more nodes |
| storage | Not Supported | Not Supported | SupportedBetween 2 and 4 nodes | Not supported | |
| none/off | Supported3 or more nodes | Supported2 or more nodes | Not supported | Supported | |
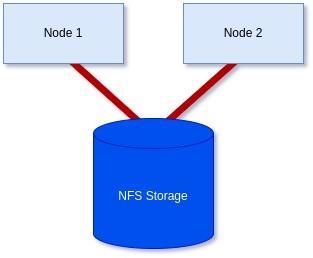
We have a two-node cluster that wants to use external storage for a quorum, so the only supported combination would be ‘storage’ for both values. However, you can see from the table how flexible this can be when you require more nodes, offering many ways to achieve communication and provide a quorum.
Step 4: Initialize the Witness file:
To initialize the witness file and enable its use, you must run the following command on each node:
[root@server1-LK ~]# /opt/LifeKeeper/bin/qwk_storage_init
It will pause when run until each node has completed so execute the command on the first node in the cluster, then the second, and so on before coming back to check the command is completed with no errors.
Example:
[root@server1-LK ~]# /opt/LifeKeeper/bin/qwk_storage_init
ok: LifeKeeper is running.
ok: The LifeKeeper license key is successfully installed.
ok: QWK parameter is valid.
QWK object of /nfs/general/nodeA is not yet avail.
/nfs/general/nodeA already exsits as not QWK_STORAGE_OBJECT: overwrite? (y/N): y
ok: The path of QWK object is valid.
ok: down: /opt/LifeKeeper/etc/service/qwk-storage: 1377s
ok: Initialization of QWK object of own node is completed.
QWK object of /nfs/general/nodeB is not yet avail.
QWK object of /nfs/general/nodeB is not yet avail.
QWK object of /nfs/general/nodeB is not yet avail.
QWK object of /nfs/general/nodeB is not yet avail.
QWK object of /nfs/general/nodeB is not yet avail.
QWK object of /nfs/general/nodeB is not yet avail.
QWK object of /nfs/general/nodeB is not yet avail.
ok: quorum system is ready.
ok: run: /opt/LifeKeeper/etc/service/qwk-storage: (pid 14705) 1s, normally down
Successful.
Step 5: Validate Configuration:
The configuration can be validated by running the following command:
/opt/LifeKeeper/bin/lktest
Should it find any errors, they will be printed to the terminal for you. In the example below, I hadn’t replaced the special characters in my hostname so it highlighted it was unable to find the storage.
[root@server1-LK ~]# /opt/LifeKeeper/bin/lktest
/opt/LifeKeeper/bin/lktest: /etc/default/LifeKeeper[308]: QWK_STORAGE_OBJECT_server1_LK.localdomain=/nfs/general/nodeA: not found
/opt/LifeKeeper/bin/lktest: /etc/default/LifeKeeper[309]: QWK_STORAGE_OBJECT_server2_LK.localdomain=/nfs/general/nodeB: not found
F S UID PID PPID C CLS PRI NI SZ STIME TIME CMD
4 S root 2348 873 0 TS 39 -20 7656 15:49 00:00:00 lcm
4 S root 2388 882 0 TS 39 -20 59959 15:49 00:00:00 ttymonlcm
4 S root 2392 872 0 TS 29 -10 10330 15:49 00:00:00 lcd
4 S root 8591 8476 0 TS 19 0 7670 15:58 00:00:00 lcdremexec -d server2-LK.localdomain -e — cat /proc/mdstat
You can also confirm that the witness file is being updated via the command line like so:
[root@server1-LK ~]# cat /nfs/general/nodeA
signature=lifekeeper_qwk_object
local_node=server1-LK.localdomain
time=Thu Feb 15 14:10:56 2024
sequence=157
node=server2-LK.localdomain
commstat=UP
checksum=13903688106811808601
A Successful File Share Witness Using NFS
Setting up a file share witness using NFS is easy! It can be powerful if you are restricted to two nodes but need better resilience to split-brain events, especially in the cloud where you can leverage something like AWS’s EFS… Another essential part can be utilizing more communications paths, but that’s a different blog. However, by following the steps outlined in this guide, you can enhance the resilience of your clustered applications and minimize the risk of downtime. Always refer to the SIOS documentation and best practices for further guidance and optimization of your high-availability setup. It’s publicly available and extremely comprehensive!
SIOS High Availability and Disaster Recovery
SIOS Technology Corporation provides high availability and Disaster Recovery products that protect & optimize IT infrastructures with cluster management for your most important applications. Contact us today for more information about our services and professional support.
Reproduced with permission from SIOS
SIOS Product Management team is pleased to announce the general availability of SIOS LifeKeeper for Linux v 9.8.1.
SIOS Product Management team is pleased to announce the general availability of SIOS LifeKeeper for Linux v 9.8.1.
New in LifeKeeper Linux v 9.8.1
- New LifeKeeper Web Management Console Designed for Ease-of-use for system administrators in the establishment and operation phases, particularly in cloud environments. NOTE in v 9.8.1 customers can choose to run the new LWMC or the existing Java-based GUI. New features in LWMC include:
- New set up progress tracking
- New “information cues” provide self-help for all functionality
- Self-Contained – No need for additional installations or add-ons
- Language localization – Initially available in both Japanese and English language
- Simplified firewall management – access on only 2 TCP ports
- Responsive design enables use with tablets and smart phones
- Broader Support – Platforms, OS and Enhanced SAP support
- Enhanced security options
- Support for IMDS2 (Instance Metadata Service) in AWS which provides enhanced protection for programs accessing sensitive instance metadata including cloud instance ID, IP address, and the security group to which it belongs.
- Support for Security-Enhanced Linux (SELinux) in all three modes: enforcing, security, and disabled. SELinux provides access control to the Linux kernel as required by the U.S. National Security Agency (NSA).
- Support for additional platforms
- Fujitsu Enterprise PostGres 15
- Maria DB v10.5 – 10.11
- Maria DB v11.0 – 11.1
- Support for latest operating system releases
- Red Hat, Miracle, Oracle, Rocky Linux 8.8
- Rocky, Oracle Linux 9.2
- Rocky Linux 9.1
- Red Hat Linux 8.9
- Red Hat Linux 9.3
- SLES 15 SP5
- Support operating system versions built for enhanced SAP support SAP ARK
- Red Hat Linux 8.7
- Red Hat Linux 8.8
- SLES 15 SP5
- New SIOS LifeKeeper SAP HANA Application Recovery Kit
- Red Hat Linux 8.8
First 30 days: Key things to know for a newbie to SIOS LifeKeeper or SIOS DataKeeper
First 30 days: Key things to know for a newbie to SIOS LifeKeeper or SIOS DataKeeper
As a relatively new employee, my boss asked me to write down my impressions of SIOS products and things that newbie’s to SIOS might like to know. Here are my thoughts.
Key Product Concepts: Clustering and Data Mirroring
LifeKeeper (Windows or Linux) is clustering software that monitors the whole application stack (network, storage, O/S, database, application software and server hardware). It allows you to specify backup physical or virtual resources (called nodes), and a communication path to connect them. Associations on each node can be created to represent resource hierarchy, for example an association can be made between a database application and the database data. This association keeps the app and the data together when systems are migrated. Lifekeeper also offers the ability to view system logs of the nodes.
DataKeeper is a software tool that is bundled with LifeKeeper. It provides capability to real-time mirror local source drives to destination drives which reside elsewhere on the customer’s network or in the cloud. This provides resilience to a drive outage or failure. Drive data mirroring is handled by SIOS software which does automatic synchronization of data from the source to the destination when changes occur on the source drive. A bitmap is utilized to map the writes to specific blocks and block-level writing is used to perform the copies.
Key Datakeeper and Lifekeeper Product Features and Details
Linux and Windows operating systems are supported for both products.
Lifekeeper offers high IT resilience to problems, keeping systems up and running. If a problem is detected, the system will attempt to restart the application. If this is unsuccessful, it will perform a failover to the standby node. If a communication path goes down, intervention occurs and makes a determination on which node becomes the source node based on data available to each node and provisioned quorum settings.
DataKeeper allows you to configure source and destination connections for Synchronous or Asynchronous drive writing. Synchronous file writing, means that the system completes the write to the destination before it reports that the write is complete; it is slower response, but safer. With asynchronous file writing, the write operations are performed in the background providing faster response. Datakeeper uses WAN throttling and data compression for efficiency.
The combination of products can be used to migrate applications to new VMs or perform maintenance on secondary systems while keeping the primaries live.
Datakeeper and Lifekeeper Product Value
A main benefit of using SIOS Datakeeper is that you can use locally attached drives that already exist on your system. There is no need to plan for and purchase storage hardware. There isn’t the concern of having a RAID controller failing, preventing access to all of the storage, or the whole storage unit being targeted to attacks such as ransomware.
Lifekeeper is available as a Cluster solution using multiple nodes with resource failure detection and failover capability, or is available in a single node variant (Single Server Protection) providing resource failure detection and reboot capability for a single server system. Both are available for Linux and Windows offering protection for a variety of types of customer’s system. LifeKeeper does not require any customized, fault-tolerant hardware.
Linux Lifekeeper supports RHEL9-7, SLES15-12, Oracle Linux 9-6, CentOS 8-6 Rocky 8-6, Miracle 9-8, and can be hosted using VMware vSphere, VMware Cloud on AWS, KVM, Oracle VM Server and Nutanix Acropolis Hypervisor. Linux LifeKeeper installation setup script utilizes package manager tools to install the product.
Key Points to Know
A newbie to SIOS LifeKeeper or DataKeeper can run into a few common points of confusion. Here are some to be aware of:
Datakeeper:
- Setting up a mirror – the destination drive has to be at least as large as the source.
- If the mirror is paused, and changes are made to target, when the mirror is restarted, those changes will be examined and overwritten with the original data from the source.
Lifekeeper:
- You must bring up your associated child resources before bringing up the parent resource.
SIOS Technical Documentation
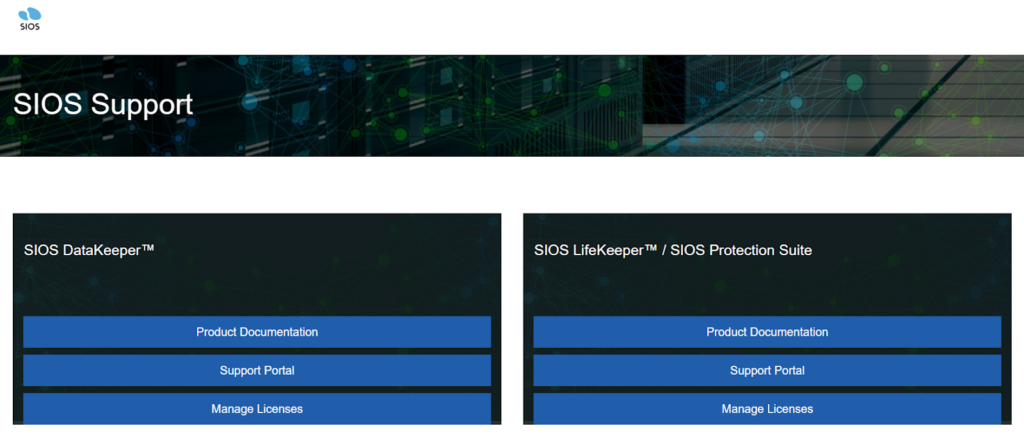
Read the official SIOS technical documentation to learn more about the product details and how to troubleshoot issues. From the support page, you can go to the Support Portal.
The Support Portal has the following tabs:
– Solutions tab takes you to a page showing Problem / Solution combinations.
– Cases tab takes you to a page showing various cases in detail
Both pages have search panels allowing the customer to hone in on relevant records.
Key Disaster Recovery Terms and Terminology
Automatic failover – detection of failure and switching of primary and standby drives is handled by the SIOS software, allowing the customer’s system to still function properly should an outage occur.
Application Recovery Kits (ARKs) – are available to protect your business-critical applications and data from downtime and disasters. ARKs provide the capability for performing setup, automation of manual tasks and failover.
Cluster – group of physical or virtual machines that behave as a single system, providing redundancy to create a high-availability resource.
Mirroring – intentionally synchronizing primary drive content changes to a standby drive in real-time.
Switchover – User initiated switching of source and standby drives. Used when system maintenance needs to be performed on a drive.
Lessons and Tips for the Next Newbie:
What has proved most useful for me for retaining what I have learned so far is to take lots of notes, and record screen video on training sessions with peers. This gives you something concrete to refer to at a later date.
Practice setting up mirrors, getting them connected and working, and then performing switch-overs has been very helpful to my understanding of the product. Practice practice practice. The official documentation is an excellent resource to read up on how to perform an operation.
SIOS High Availability and Disaster Recovery
SIOS Technology Corporation provides high availability and Disaster Recovery products that protect & optimize IT infrastructures with cluster management for your most important applications. Contact us today for more information about our services and professional support.
Reproduced with permission from SIOS
What is a License Rehost?

What is a License Rehost?
How to Perform a License Rehost in the SIOS Licensing Portal
When a SIOS perpetual product license is first activated in the SIOS Licensing Portal, it is tied to a unique identifier that is local to that server. That unique identifier is typically a MAC address (which is also referred to as the system’s hostid) that is assigned to a Network Interface Controller (NIC). When this system’s unique identifier changes from the original unique identifier that was used to activate the license, a license rehost is required to continue using the SIOS Products.
A license rehost is a procedure that is required to activate an updated product license key when the system’s unique identifier (the MAC address/system’s hostid) no longer matches the original system’s unique identifier in the product license key.
When is a License Rehost required?
A rehost is required when the system’s unique identifier changes from the original unique identifier used to create the original license key. There are several things that can cause the unique identifier to change:
- The unique identifier may change as a result of a network configuration change in the current system.
- If the current system has failed and is being replaced by a new system, the system’s unique identifier will change and the product license key needs to be reactivated.
- The product license key needs to be reactivated if the current system is being upgraded to a new system.
What Problem occurs when a License Rehost is required
The most common problem that occurs when a license rehost is required is that the SIOS product will not start running properly. When this occurs the logs will show a failure due to an invalid license key because the license key that is installed on the system will not match the system’s unique identifier.
On a Windows system, this error appears in the Event Viewer under the Application logs
On a Linux system, this error appears in the LifeKeeper log located in /var/log.
What is the Procedure for Rehosting a License Key
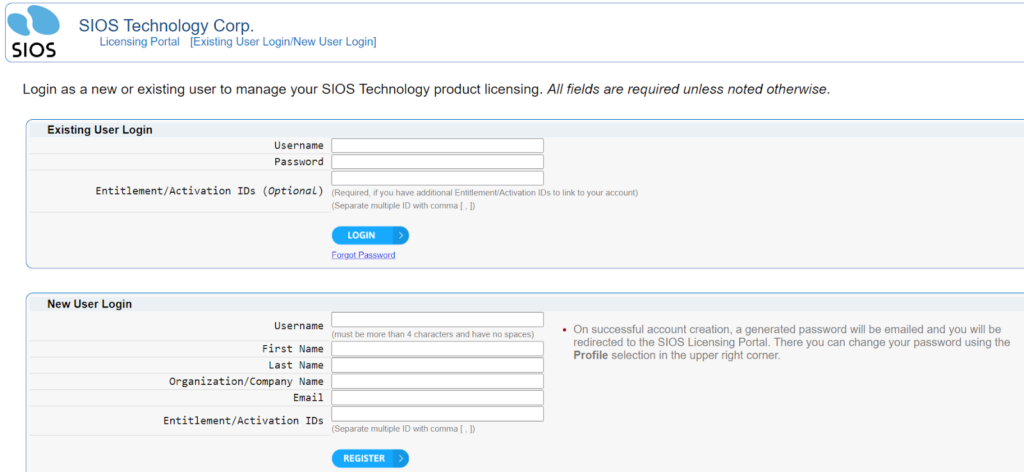
The first step in the procedure is to login to the SIOS Licensing portal. Go to support.us.sios.com and select Manage Licenses
After selecting Manage Licenses, login to the Licensing site:
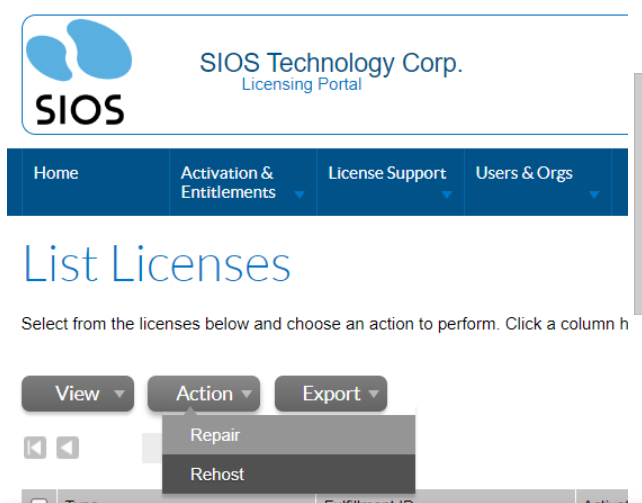
Once logged in, go to License Support and List Licenses
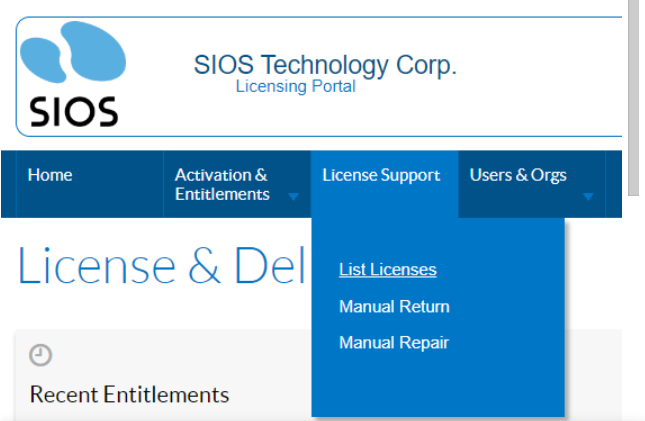
- Select the license that you need to rehost (check the box on the left)
- Select Action, Rehost
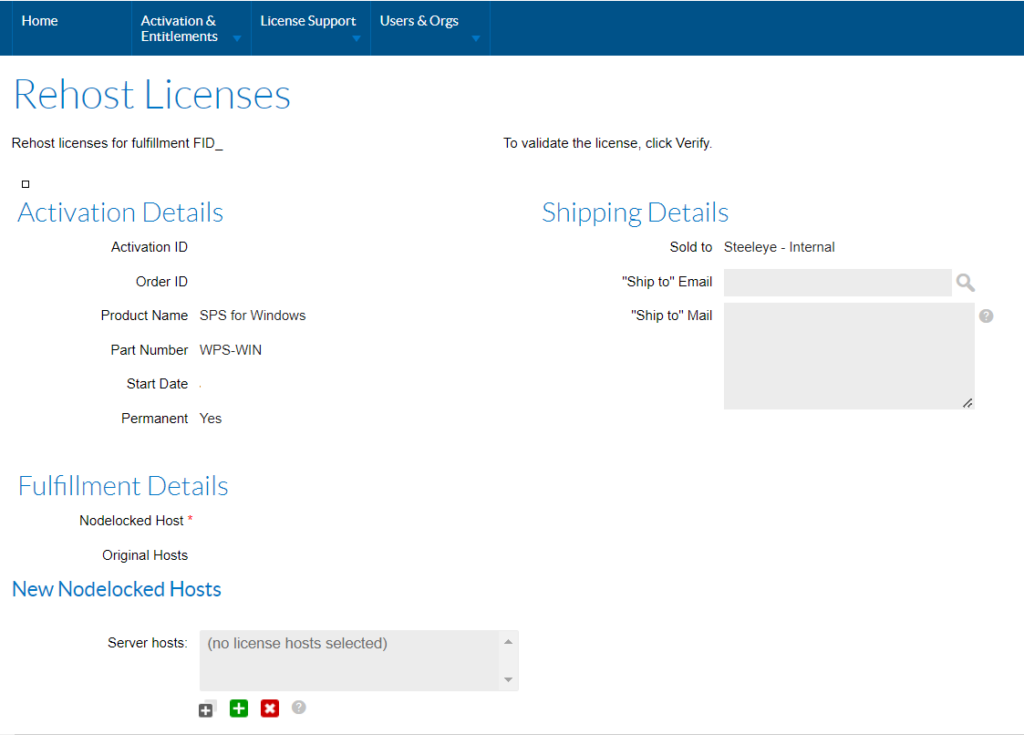
Click on the Green Plus sign
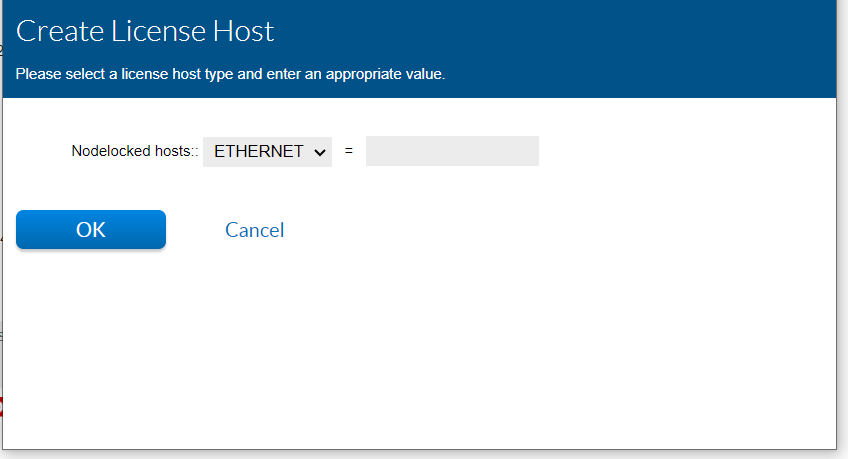
Enter the new 12 character hostid / MAC address and click OK. Do not include commas, colons, or spaces between the 12 characters.
- Click the Rehost button and click Complete
- Select the license that was rehosted by checking the box on the left.
- Select View, Email License and enter your email address. Click Send at the bottom of the screen.
SIOS High Availability and Disaster Recovery
SIOS Technology Corporation provides high availability cluster software that protects & optimizes IT infrastructures with cluster management for your most important applications. Contact us today for more information about our services and professional support.
Reproduced with permission from SIOS
Ensuring HA for Building Management Systems

Ensuring HA for Building Management Systems
Why BMS Serves as a Role Model for Other Industries
At the heart of every modern building, there is a building management system (BMS) that controls the heating, ventilation, and air conditioning (HVAC), the lighting and security systems, the fire suppression systems, and more. Building managers rely on BMS consoles to streamline and optimize a building’s operations and ensure the tenants’ environment is comfortable and safe. A BMS needs to operate reliably whether it is in an on-premises data center or a public cloud environment, such as AWS EC2, Azure, or Google Cloud Platform (GCP). There are several approaches to protecting a BMS from downtime and disasters—using fault tolerant (FT) solutions, high availability (HA) solutions, and disaster recovery (DR) solutions—but determining which approach is best depends upon multiple considerations.
How SIOS Ensures HA for BMS
SIOS’ EMEA Technical Director Harry Aujla explains in this TFiR video interview why high availability is an integral part of BMS solutions and a good model for other critical applications. He goes on to explain some of the ways BMS has evolved over the years with the increasing reliance on IT. He says, “If BMS customers fully understand how high availability works on the cloud, then I think we’ll see a more significant migration of BMS solutions to cloud platforms.”SIOS Technology Corporation provides high availability cluster software that protects & optimizes IT infrastructures with cluster management for your most important applications. Contact us today for more information about our professional services and support.
Reproduced with permission from SIOS