Date: January 22, 2018
Tags: cluster, DataKeeper Cluster Edition, Microsoft
CREATING YOUR CLUSTER AND CONFIGURING THE QUORUM: NODE AND FILE SHARE MAJORITY
INTRODUCTION
Welcome to Part 1 of my series “Step-by-Step: Configuring a 2-node multi-site cluster on Windows Server 2008 R2”. Before we jump right in to the details, let’s take a moment to discuss what exactly a multi-site cluster is and why I would want to implement one. Microsoft has a great webpage and white paper that you will want to download to get you all of the details, so I won’t repeat everything here. But basically a multi-site cluster is a disaster recovery solution and a high availability solution all rolled into one. A multi-site cluster gives you the highest recovery point objective (RTO) and recovery time objective (RTO) available for your critical applications. With the introduction of Windows Server 2008 failover clustering a multi-site cluster has become much more feasible with the introduction of cross subnet failover and support for high latency network communications.
I mentioned “cross-subnet failover” as a great new feature of Windows Server 2008 Failover Clustering, and it is a great new feature. However, SQL Server has not yet embraced this functionality, which means you will still be required to span your subnet across sites in a SQL Server multi-site cluster. As of Tech-Ed 2009, the SQL Server team reported that they plan on supporting this feature, but they say it will come sometime after SQL Server 2008 R2 is released. For the foreseeable future you will be stuck with spanning your subnet across sites in a SQL Server multi-site cluster. There are a few other network related issues that you need to consider as well, such as redundant communication paths, bandwidth and file share witness placement.
NETWORK CONSIDERATIONS
All Microsoft failover clusters must have redundant network communication paths. This ensures that a failure of any one communication path will not result in a false failover and ensures that your cluster remains highly available. A multi-site cluster has this requirement as well, so you will want to plan your network with that in mind. There are generally two things that will have to travel between nodes: replication traffic and cluster heartbeats. In addition to that, you will also need to consider client connectivity and cluster management activity. You will want to be sure that whatever networks you have in place, you are not overwhelming the network or you will have unreliable behavior. Your replication traffic will most likely require the greatest amount of bandwidth; you will need to work with your replication vendor to determine how much bandwidth is required.
With your redundant communication paths in place, the last thing you need to consider is your quorum model. For a 2-node multi-site cluster configuration, the Microsoft recommended configuration is a Node and File Share Majority quorum. For a detailed description of the quorum types, have a look at this article.
The most common cause of confusion with the Node and File Share Majority quorum is the placement of the File Share Witness. Where should I put the server that is hosting the file share? Let’s look at the options.
OPTION 1 – PLACE THE FILE SHARE IN THE PRIMARY SITE.
This is certainly a valid option for disaster recovery, but not so much for high availability. If the entire site fails (including the Primary node and the file share witness) the Secondary node in the secondary site will not come into service automatically, you will need to force the quorum online manually. This is because it will be the only remaining vote in the cluster. One out of three does not make a majority! Now if you can live with a manual step being involved for recovery in the event of a disaster, then this configuration may be OK for you.
OPTION 2 – PLACE THE FILE SHARE IN THE SECONDARY SITE.
This is not such a good idea. Although it solves the problem of automatic recovery in the event of a complete site loss, it exposes you to the risk of a false failover. Consider this…what happens if your secondary site goes down? In this case, your primary server (Node1) will go also go offline as it is now only a single node in the primary site and will no longer have a node majority. I can see no good reason to implement this configuration as there is too much risk involved.
OPTION 3 – PLACE THE FILE SHARE WITNESS IN A 3RD GEOGRAPHIC LOCATION
This is the preferred configuration as it allows for automatic failover in the event of a complete site loss and eliminates any the possibility of a failure of the secondary site causing the primary node to go offline. By having a 3rd site host the file share witness you have eliminated any one site as a single point of failure, so now the cluster will act as you expect and automatic failover in the event of a site loss is possible. Identifying a 3rd geographic location can be challenging for some companies, but with the advent of cloud based utility computing like Amazon EC2 and GoGrid, it is well within the reach of all companies to put a file share witness in the clouds and have the resiliency required for effective multi-site clusters. In fact, you may consider the cloud itself as your secondary data center and just failover to the cloud in the event of a disaster. I think the possibilities of cloud based computing and disaster recovery configurations are extremely enticing and in fact I plan on doing a whole blog post on a just that in the near future.
CONFIGURE THE CLUSTER
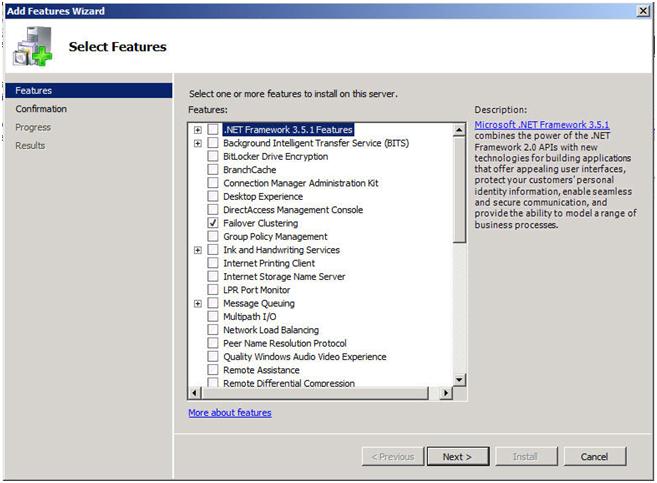
Now that we have the basics in place, let’s get started with the actual configuration of the cluster. You will want to add the Failover Clustering feature to both nodes of your cluster. For simplicity sake, I’ve called my nodes PRIMARY and SECONDARY. This is accomplished very easily through the Add Features Wizard as shown below.
Next you will want to have a look at your network connections. It is best if you rename the connections on each of your servers to reflect the network that they represent. This will make things easier to remember later.

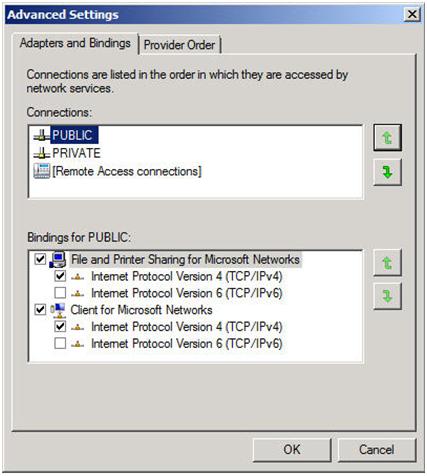
You will also want to go into the Advanced Settings of your Network Connections (hit Alt to see Advanced Settings menu) of each server and make sure the Public network is first in the list.
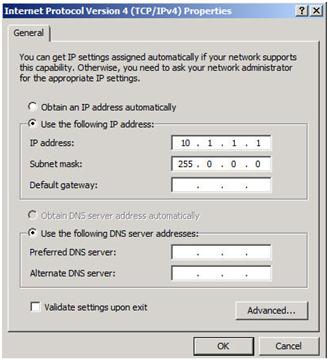
Your private network should only contain an IP address and Subnet mask. No Default Gateway or DNS servers should be defined. Your nodes need to be able to communicate across this network, so make sure the servers can communicate across this network; add static routes if necessary.
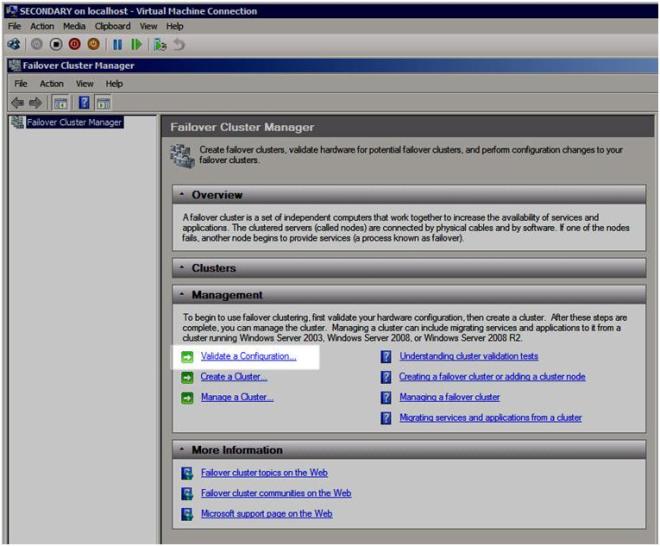
Once you have your network configured, you are ready to build your cluster. The first step is to “Validate a Configuration”. Open up the Failover Cluster Manager and click on Validate a Configuration.
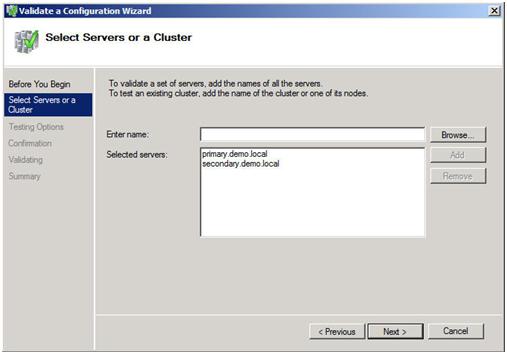
The Validation Wizard launches and presents you the first screen as shown below. Add the two servers in your cluster and click Next to continue.
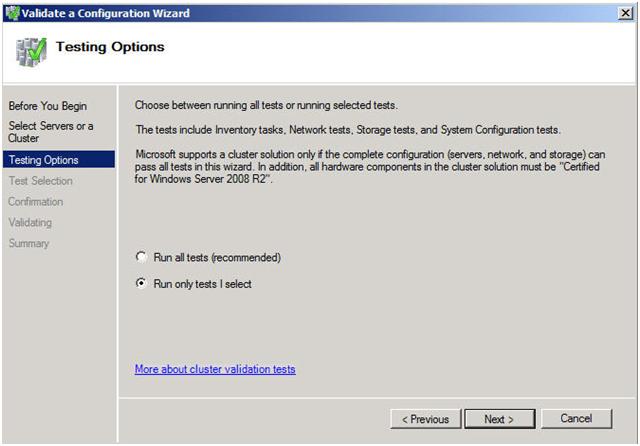
A multi-site cluster does not need to pass the storage validation (see Microsoft article). Toskip the storage validation process,click on “Run only the tests I select” and click Continue.
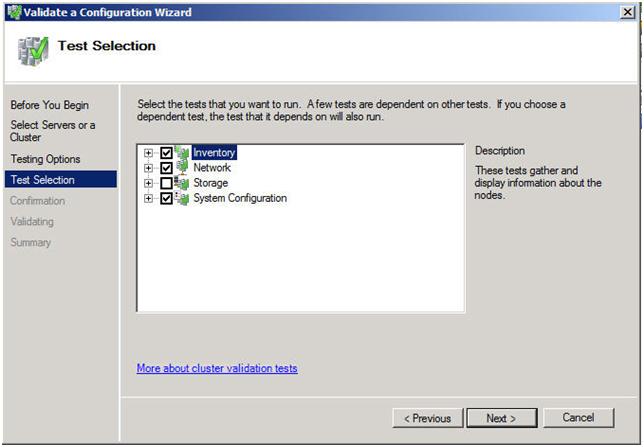
In the test selection screen, unselect Storage and click Next
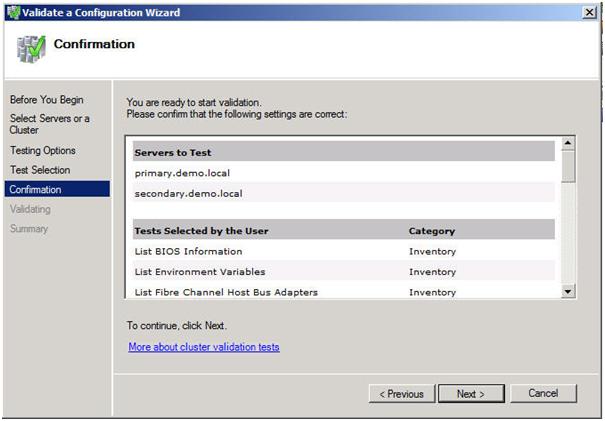
You will be presented with the following confirmation screen. Click Next to continue.
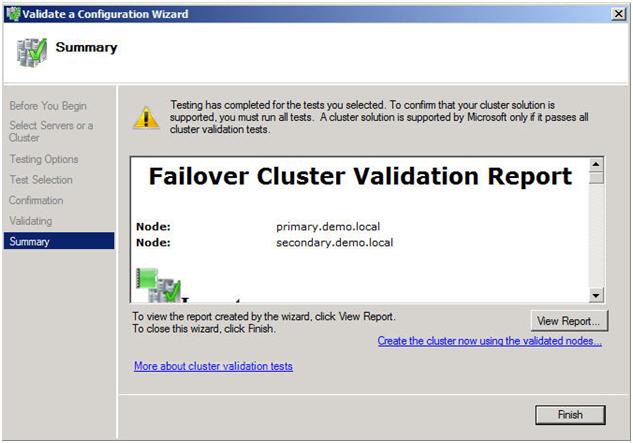
If you have done everything right, you should see a summary page that looks like the following. Notice that the yellow exclamation point indicates that not all of the tests were run. This is to be expected in a multi-site cluster because the storage tests are skipped. As long as everything else checks out OK, you can proceed. If the report indicates any other errors, fix the problem, re-run the tests, and continue.
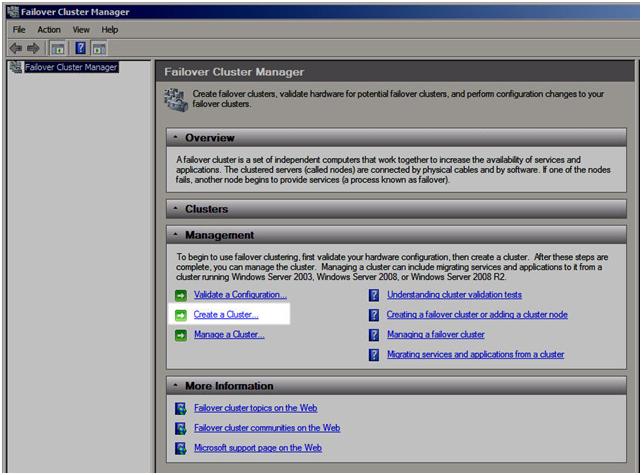
You are now ready to create your cluster. In the Failover Cluster Manager, click on Create a Cluster.
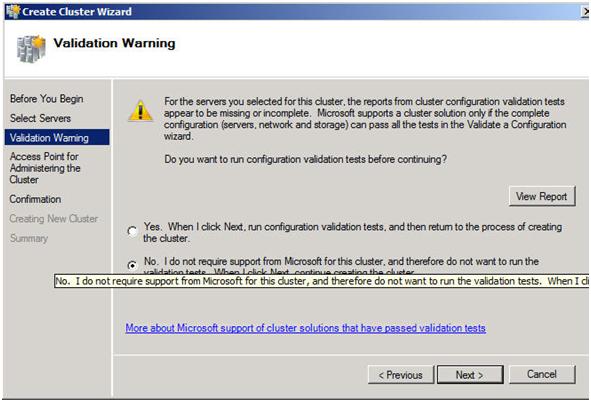
The next step asks whether or not you want to validate your cluster. Since you have already done this you can skip this step. Note this will pose a little bit of a problem later on if installing SQL as it will require that the cluster has passed validation before proceeding. When we get to that point I will show you how to by-pass this check via a command line option in the SQL Server setup. For now, choose No and Next.
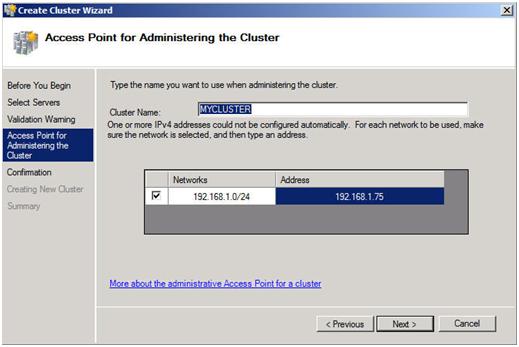
The next step is that you must create a name for this cluster and IP for administering this cluster. This will be the name that you will use to administer the cluster, not the name of the SQL cluster resource which you will create later. Enter a unique name and IP address and click Next.
Note: This is also the computer name that will need permission to the File Share Witness as described later in this document.
Confirm your choices and click Next.
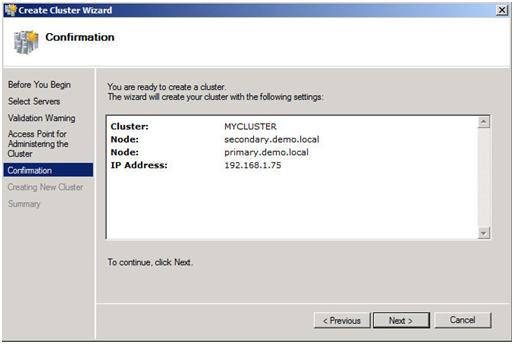
Congratulation, if you have done everything right you will see the following Summary page. Notice the yellow exclamation point; obviously something is not perfect. Click on View Report to find out what the problem may be.
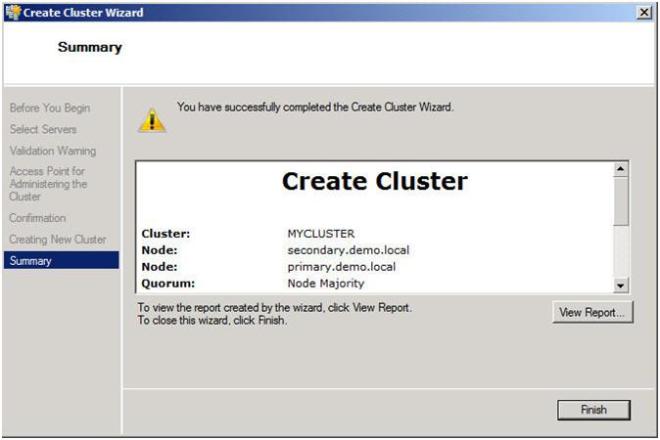
If you view the report, you should see a few lines that look like this.

Don’t fret; this is to be expected in a multi-site cluster. Remember we said earlier that we will be implementing a Node and File Share Majority quorum. We will change the quorum type from the current Node Majority Cluster (not a good idea in a two node cluster) to a Node and File Share Majority quorum.
IMPLEMENTING A NODE AND FILE SHARE MAJORITY QUORUM
First, we need to identify the server that will hold our File Share witness. Remember, as we discussed earlier, this File Share witness should be located in a 3rd location, accessible by both nodes of the cluster. Once you have identified the server, share a folder as you normally would share a folder. In my case, I create a share called MYCLUSTER on a server named DEMODC.
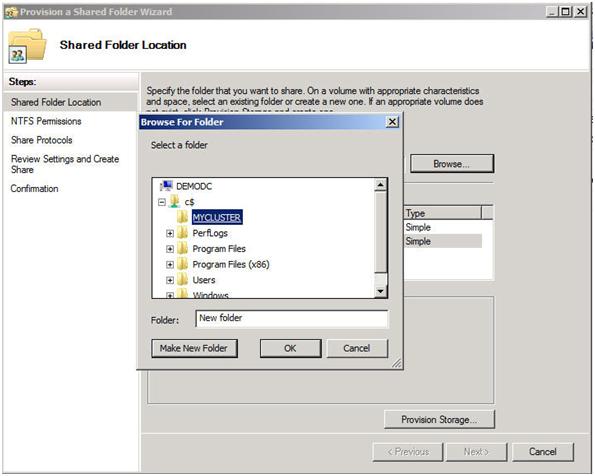
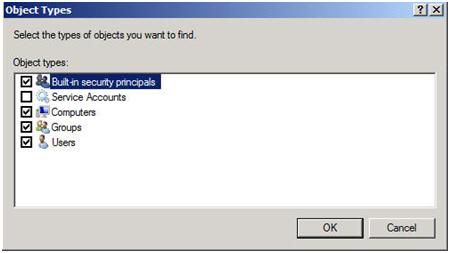
The key thing to remember about this share is that you must give the cluster computer name read/write permissions to the share at both the Share level and NTFS level permissions. If you recall back at Figure 13, I created my cluster and gave it the name “MYCLUSTER”. You will need to make sure you give the cluster computer account read/write permissions as shown in the following screen shots.
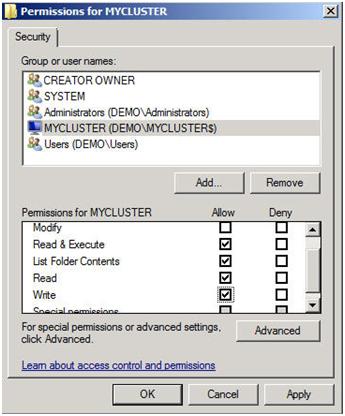
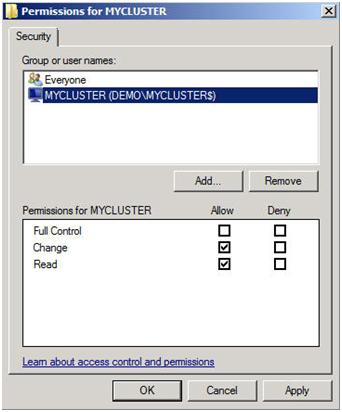
Now with the shared folder in place and the appropriate permissions assigned, you are ready to change your quorum type. From Failover Cluster Manager, right-click on your cluster, choose More Actions and Configure Cluster Quorum Settings.
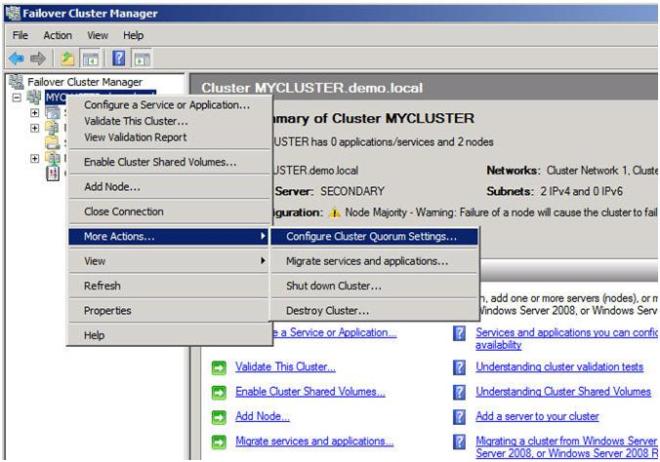
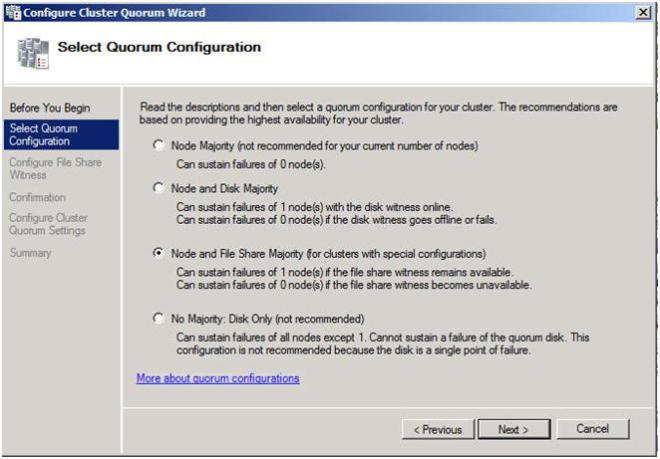
On the next screen choose Node and File Share Majority and click Next.
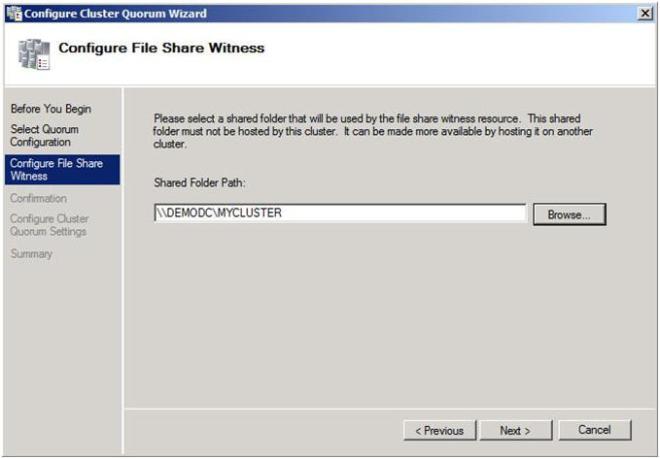
In this screen, enter the path to the file share you previously created and click Next.
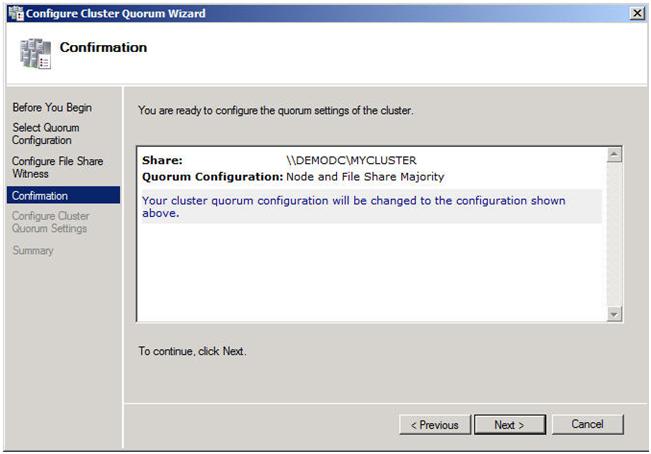
Confirm that the information is correct and click Next.
Assuming you did everything right, you should see the following Summary page.
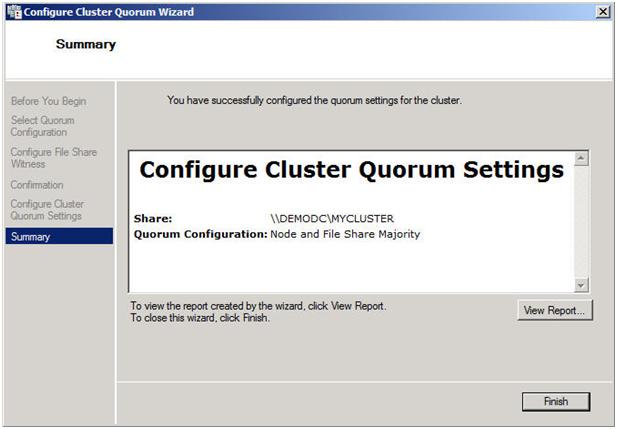
Now when you view your cluster, the Quorum Configuration should say “Node and File Share Majority” as shown below.

The steps I have outlined up until this point apply to any multi-site cluster, whether it is a SQL, Exchange, File Server or other type of failover cluster. The next step in creating a multi-site cluster involves integrating your storage and replication solution into the failover cluster. This step will vary from depending upon your replication solution, so you really need to be in close contact with your replication vendor to get it right. In Part 2 of my series, I will illustrate how SteelEye DataKeeper Cluster Edition integrates with Windows Server Failover Clustering to give you an idea of how one of the replication vendor’s solutions works.
Other parts of this series will describe in detail how to install SQL, File Servers and Hyper-V in multi-site clusters. I will also have a post on considerations for multi-node clusters of three or more nodes.
Reproduced with permission from https://clusteringformeremortals.com/2009/09/15/step-by-step-configuring-a-2-node-multi-site-cluster-on-windows-server-2008-r2-%E2%80%93-part-1/